Laura's Colourful Coquelicot Skirt and Pattern Hack
- Melanie Boivin
- Sep 23, 2021
- 4 min read

Here is another post on the Wildflower Design guest blogger series! Today I am featuring Laura, known as the @thespeckyseamstress on instagram, and also on Youtube! Laura has such a fun and colourful sense of style, and I love how she put her own personal touch on the Coquelicot skirt pattern! She hacked the pattern so that the ties were altered to attach with a belt loop rather than tying up in a bow or knot.
Read Laura's review and process and learn how she created the belt loop hack:

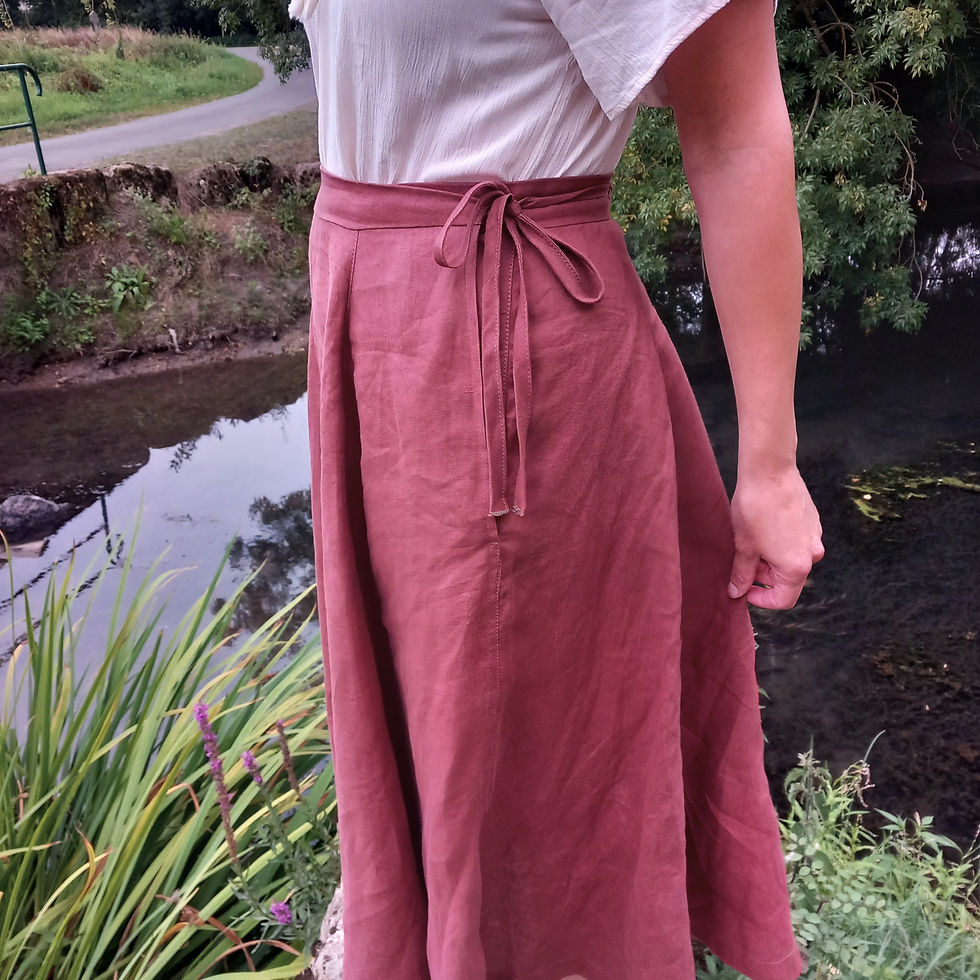
As soon as I saw the Coquelicot release, I bought it – an adjustable, size inclusive half circle skirt with historically large pockets – what’s not to love?! I loved all of the tester versions and initially fell in love with View B – the gathered full circle version. I wanted to sew it up straight away, but some of you may know it had been a bit of a rocky summer for me, and I hadn’t quite got around to it. But I’ve been reflecting a lot on my clothes as I gradually return to the office and have been seriously lacking some beautiful simple (and/or statement) skirts to wear back in the office. I had got the pattern printed and pulled a couple of fabrics from my stash for versions when Melanie got in touch to ask me to write a blog post here on Wildflower Designs. Perfect timing!

I have voiced my frustration about circle skirt calculators being pretty rubbish at size inclusivity before. So we can all rejoice here, because if you’re a little scared of the maths, or aren’t confident enough to create your own circle skirt pattern, you’ll be walked through everything here with the Coquelicot – and come out with a beautifully adjustable skirt, ready for any body fluctuations without having to change up your wardrobe.

Because of the historic inspiration of the Coquelicot, many of the tester versions take on a similarly historic vibe – but circle skirts are so versatile it really will work for your style – whatever that may be! The pattern says its 18th century with a 50s vibe and I’m definitely more in the 50’s end of that spectrum in terms of style so I wanted to go for a skirt that would work paired with converse and a tee for work or leisure. And for me that meant a fun bold print, and a little bit of a hack to remove the waist ties, so that I could wear a tee untucked without a bulky bow.

My fabric is a medium weight cotton from Sew & Flo Fabrics – the print is called Lemon Drop and I just love how bright it is – can you believe I don’t really own any pink in my wardrobe, but I was so drawn to the print I couldn’t help but pick some of this up. The fabric has enough structure for the half circle shape of View A, giving a perfectly twirlable hemline! The colour will go so well with my range of bright cardigans too!

I removed the waist ties by adding a buckle at each side of the front waistband – with one extra long tie (the length of one tie on the fold!) at one end. The buckle pieces are added the end of the front waist tie without the tie attached, and between the waistband and the tie when you sew them together. Remember not to sandwich this in right in the middle, but right down towards one end, just leaving 1.5cm seam allowance – this means when you fold the tie in half and attach it to the skirt, it’ll sit perfectly central to the tie! This allows you to secure the waist tie at both ends, leaving a nice secure finish.
And of course, I had to finish the circular hem with a coordinating bias binding, didn’t I?!

I’ve already got 3 more planned – it will work so well with an Ankara wax and I really want to make a maxi ruffle hack, so watch out for more!
Laura
a.k.a @thespeckyseamstress
Step -by Step Instructions:
You will need 2 buckles or 4 D rings. Omit one of the ties, as you will only need one.
( replace this step at step 9 in the instructions)
Use the D-Ring loop piece for view A to copy, and trim down to 8cm or so in length. Or simply cut out 2 squares, 8cm by 8cm (or about 3 1/8 inch). Then fold in half, right sides together and sew along one edge with a seam allowance of 1.5cm (3/8 inch). Turn your tube right side out, and press it with your iron. repeat for second buckle loop.

2. Form a loop and slide your buckle or 2 D rings and sew along the edge of the buckle to hold it in place. Repeat for second buckle.

3. Take your front waistband piece, and place your buckle loop 1.5cm down from the top along the short edge. Baste in place, then place one of the ties over that, right sides together and sew together at 1.5cm seam allowance. For the opposite side, simply baste the buckle in place.

4. Press the tie out. Continue with the regular instructions for attaching the front waistband to the front skirt.

5. You should end up with buckles on either side of the skirt front waistband and one side with the tie.

6. Once the skirt is completed, you will secure the front skirt by using the tie to go through the opposite buckle, then back through the 1st buckle. you can tuck in the end, or leave it loose, or even create a small belt loop to hold the loose end.